One of the things that I found most confusing when I started fishing was which fly do I choose when and what on earth are they all supposed to represent? That is why I wrote this article, to give the beginner an overview of what the flies represent. I’ll give a description of the different hatch stages and the most common fly that fly fishermen/women use to catch trout that are feeding at those stages.
I am just going to focus on Mayflies in this article as they are the most common for most people.
Mayflies
Nymphs
Mayflies start their life underwater as eggs. From there they hatch into nymphs. The nymph is the first stage that interests us as fly fishers. Most fish do most of their feeding underwater, hence nymph patterns can be the most productive way to fish. Some purists feel however that it isn’t true fly fishing to use a nymph.
A classic mayfly nymph.
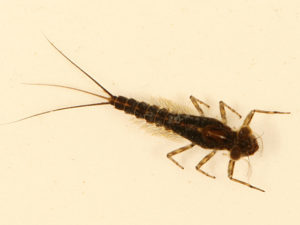
Photo: Tom Murray http://bugguide.net/node/view/53307/bgpage
Typical patterns include:
The pheasant tail nymph with and without bead at head.

Photo: http://www.flyforums.co.uk/fly-tying-patterns-step-step/7370-pheasant-tail-nymph-my-way.html

Photo: http://flydepot.com/flyfishing/beadhead-flashback-pheasant-tail-nymph/pid–407/
Nymphs can be tied in a variety of different sizes, and colours including with beads and flashy backs. These will suit local conditions. Usually though you can’t go far wrong with a basic pheasant tail nymph, with and without a gold bead.
Emergers
Emergers represent mayfly as they are emerging from the outer shell that gives the nymph shapes. This takes place at the surface of the water and makes the fly susceptible to being taken by trout. Part of the fly is usually tied to sit under the water, while there is an “emerging” wing floating on top.
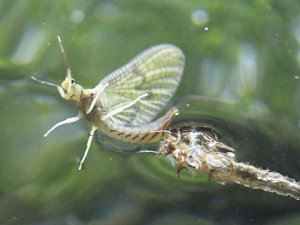
Photo: http://www.flyfishingdevon.co.uk/wet-flies-spiders-nymphs-and-flymphs.shtml
The classic emerger fly is the Klinkhammer. Though there are numerous other patterns.
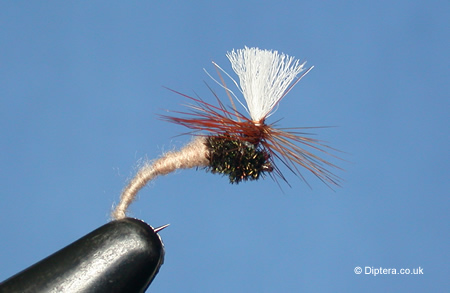
Photo: http://www.diptera.co.uk/patterns/k/klinkhammer_ti.html
Duns
Duns are when the Mayfly has fully moved onto the surface of the water and are sitting on top. They tend to be lighter and finer than the older Mayflys. As such when tying them subtler colours and lighter materials are used. Duns are a short part of the Mayfly lifecycle (about 24 hours). Also the wings of a dun tend to sit upright, unlike the wings of a spinner which tend to lie flat.
In my opinion, the best all round dun is the Adam’s paracute.
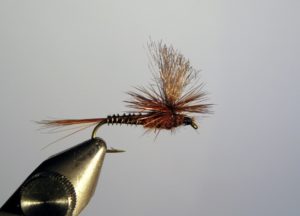
Photo: http://wifly.files.wordpress.com/2010/04/mayfly-dun-by-paul-stillmank.jpg
Notice the hackle fibres that poke out sideways. These help keep the fly the right way up when casting, ensuring it presents well on the water.
Other patterns include a traditional Adams and the Grey Wulff.

Spinners
Spinners are the final stage of the lifecycle of a Mayfly. They often form large clouds of insects that “spin” up and down in the air, often paired in mating. Once they have mated they drop onto the water and drop their eggs. As mentioned their wings are usually prone or “spent”. The colours of spinners are usually richer and the insect is more robust.
Parachute patterns work well also as spinners. Another popular pattern is the spent drake which you’ll notice has wings tied out to the side to represent the wings in the spent position.

Photo: https://www.fishhound.com/fly/spent-gray-drake
Summary.
Hopefully this has given you an introduction to fly patterns. To begin with focus on tying the patterns mentioned above in different colours to suit your local conditions. Instructions for most of the flies above can be found on this site.
Once you have a good number of these maybe consider branching out to some of the other thousands of patterns that are out there.